Showing posts with label z80. Show all posts

Friday, May 8, 2026

Reverse engineering Halcyon's laserdisc player command sending routines inside the Z80 ROM

When I reverse engineer laserdisc arcade game ROMs, one of my favorite things to do is find/disassemble the routines that send commands to the laserdisc players. Every laserdisc game will have these somewhere in the ROM so it's a "comfortable" place to start reverse engineering because the commands for the player are already known.
 
Due to the way Dragon's Lair was written (and even Thayer's Quest!), I assumed Halcyon would have a similar style. But after a first pass at the Z80 disassembly, I could not find these routines anywhere. To make matters worse, Halcyon uses a different laserdisc player than the rest of the laserdisc games, the Pioneer LD-700. So while I had written an interpreter for this command set (in order to get Dexter to work with Halcyon), I still had no idea how the "RDI engineering team" would approach implementing it.
 
My guess was that they would write a function to take in a command byte (such as 0x4A) and then have a common set of routines that sent this function serially across the single wire. What I actually found astonished me.
 
Within the ROM, I found tables like this:

ROM:9165 unk_9165:       db    4                 ; DATA XREF: ROM:8A31↑o
ROM:9165                                         ; ROM:8F07↑o
ROM:9165                                         ; see 8A31
ROM:9166                 db    2
ROM:9167                 db    2
ROM:9168                 db    1
ROM:9169                 db    1
ROM:916A                 db    1
ROM:916B                 db    2
ROM:916C                 db    2
ROM:916D                 db    3
ROM:916E                 db    1
ROM:916F                 db    2
ROM:9170                 db    4
ROM:9171                 db    3
ROM:9172                 db    2
ROM:9173                 db    1
ROM:9174                 db    1
ROM:9175                 db    1
ROM:9176                 db    0
I was pretty sure that this represented laserdisc commands, but just by eyeballing it, I couldn't see how. I eventually had to emulate the Halcyon in a WIP verion of Daphne v2.0 just enough to step through the ROM and observe the program flow. This required me to basically emulate the entire COP421L microcontroller too, as well as wire up most of the Z80 ports, so it was exceedingly NON-TRIVIAL to get this far.
 
I found routines that I became increasingly confident were related to laserdisc player I/O. I found arrays full of pointers to more arrays like the above example. But what confused me was I found two distinct tables of arrays, which lead me to suspect that the ROM was designed to support two different kinds of laserdisc players.
 
Using Daphne's debugger, I stepped into the routine that sent a command to the LD-700. I've included a partially annotated version below:

ROM:8DF3 SendCmdToLD700:                         ; CODE XREF: ROM:8A34↑p
ROM:8DF3                                         ; ROM:8A37↑j ...
ROM:8DF3                 di                      ; HL points to a null-terminated array containing small integers like 4, 3, 2, etc.
ROM:8DF3                                         ;
ROM:8DF3                                         ; This may send a command to the LDP because interrupts get disabled (and the LDP commands are time sensitive).
ROM:8DF4                 ld      a, (Port20Cache) ; Caches value stored at port 20.  see 441
ROM:8DF7                 and     0FEh            ; clear LDP_EXT_CTRL' bit
ROM:8DF9                 ld      d, a            ; D contains port20cache with bit0 clear
ROM:8DFA                 push    hl              ; store HL (which is pointing to the array of small integers)
ROM:8DFB                 res     0, d            ; may be redundant since bit 0 seemed to be already clear, but whatever
ROM:8DFD                 ld      bc, 332         ; ~8ms delay for "leader down" ?
ROM:8E00                 call    SendDToPort20hLoopOnBC
ROM:8E03                 set     0, d            ; set/raise LDP_EXT_CTRL'
ROM:8E05                 ld      bc, 158         ; ~4ms delay for "leader up"
ROM:8E08                 bit     7, (hl)         ; kill some time
ROM:8E0A                 bit     7, (hl)
ROM:8E0C                 bit     7, (hl)
ROM:8E0E                 bit     7, (hl)
ROM:8E10                 bit     7, (hl)
ROM:8E12                 call    SendDToPort20hLoopOnBC
ROM:8E15                 ld      a, r
ROM:8E17
ROM:8E17 LdpArrayLoop:                           ; CODE XREF: ROM:8E35↓j
ROM:8E17                 ld      b, (hl)         ; grab the next item in the null-terminated array
ROM:8E18                 xor     a               ; A = 0
ROM:8E19                 or      b               ; A = B, test to see if we've hit the end of the array (NULL)
ROM:8E1A                 inc     hl              ; arrayPtr++
ROM:8E1B                 jr      z, OnLdpArrayExhausted ; come here when we've hit the end of the array
ROM:8E1D                 call    ProcessSmallIntForLDP
ROM:8E20                 set     0, d
ROM:8E22                 ld      bc, 38          ; convert the last sent bit from a '0' to a '1' by holding the line an extra 1ms longer
ROM:8E25                 call    SendDToPort20hLoopOnBC
ROM:8E28                 ld      a, r
ROM:8E2A                 ld      a, r
ROM:8E2C                 ld      a, r
ROM:8E2E                 ld      a, r
ROM:8E30                 ld      a, r
ROM:8E32                 ld      a, r
ROM:8E34                 or      a
ROM:8E35                 jr      LdpArrayLoop    ; grab the next item in the null-terminated array
ROM:8E37 ; ---------------------------------------------------------------------------
ROM:8E37
ROM:8E37 OnLdpArrayExhausted:                    ; CODE XREF: ROM:8E1B↑j
ROM:8E37                 set     0, d            ; come here when we've hit the end of the array
ROM:8E39                 ld      bc, 759         ; 20ms delay after a command is finished, holding line high?
ROM:8E3C                 call    SendDToPort20hLoopOnBC
ROM:8E3F                 bit     7, (hl)
ROM:8E41                 ld      a, r
ROM:8E43                 ld      a, r
ROM:8E45                 ld      a, r
ROM:8E47                 ld      a, r
ROM:8E49                 ld      a, r
ROM:8E4B                 ld      a, r
ROM:8E4D                 or      a
ROM:8E4E                 pop     hl
ROM:8E4F                 ei                      ; re-enable interrupts, the timing sensitive stuff is finished
ROM:8E50                 ld      a, (Port20Cache) ; Caches value stored at port 20.  see 441
ROM:8E53                 set     0, a            ; raise LD_EXT_CTRL'
ROM:8E53                                         ; (may be redundant, as this may have already been raised)
ROM:8E55                 ld      (Port20Cache), a ; Caches value stored at port 20.  see 441
ROM:8E58                 out     (20h), a
ROM:8E5A                 jp      ConditionalLdpReturn
ROM:8E5D
ROM:8E5D ProcessSmallIntForLDP:                  ; CODE XREF: ROM:8E1D↑p
ROM:8E5D                                         ; ROM:8E7F↓j
ROM:8E5D                 push    bc              ; when this function is called, A and B may both contain the mystery small integers (4, 3, 2, etc)
ROM:8E5E                 ld      bc, 20          ; ~0.5ms pulse width.
ROM:8E61                 res     0, d
ROM:8E63                 call    SendDToPort20hLoopOnBC
ROM:8E66                 set     0, d
ROM:8E68                 ld      bc, 18
ROM:8E6B                 bit     7, (hl)         ; kill some cycles
ROM:8E6D                 bit     7, (hl)
ROM:8E6F                 bit     7, (hl)
ROM:8E71                 bit     7, (hl)
ROM:8E73                 bit     7, (hl)
ROM:8E75                 call    SendDToPort20hLoopOnBC
ROM:8E78                 pop     bc
ROM:8E79                 bit     7, (hl)         ; kill cycles
ROM:8E7B                 ld      a, 0
ROM:8E7D                 ld      a, 0
ROM:8E7F                 djnz    ProcessSmallIntForLDP
ROM:8E81                 bit     7, (hl)
ROM:8E83                 bit     7, (hl)
ROM:8E85                 bit     7, (hl)
ROM:8E87                 ld      a, r
ROM:8E89                 ret
ROM:8E8A
ROM:8E8A SendDToPort20hLoopOnBC:                 ; CODE XREF: ROM:8E00↑p
ROM:8E8A                                         ; ROM:8E12↑p ...
ROM:8E8A                 ld      a, d            ; this is almost assuredly used as part of the LDP communication
ROM:8E8B                 out     (20h), a
ROM:8E8D                 rl      a               ; these opcodes may just be designed to cause delay
ROM:8E8F                 rl      a
ROM:8E91                 rl      a
ROM:8E93                 ld      a, d
ROM:8E94                 ld      a, d
ROM:8E95                 and     0FEh            ; isolate LD_EXT_ACK
ROM:8E97                 in      a, (40h)        ; read LD_EXT_ACK (but apparentely ignore the result?)
ROM:8E99                 ld      a, r
ROM:8E9B                 dec     bc
ROM:8E9C                 ld      a, c
ROM:8E9D                 or      b
ROM:8E9E                 jr      nz, SendDToPort20hLoopOnBC ; loop until BC is 0
ROM:8EA0                 ret
After stepping through the loop, it became clear to me what those small integers (4,3,2,1) referred to and I finally cracked the code.
 
Here is my comment for the 4Ah instruction for the LD-700.

ROM:9177 LD700Cmd4AEnableAudio_Idx1A:db    4     ; DATA XREF: ROM:8F09↑o
ROM:9177                                         ; Each of these integers represents a group of bits, where all of the bits are 0 except the last bit.
ROM:9177                                         ;
ROM:9177                                         ; So the 0xA8 command that the LD-700 expects to receive first will be encoded here as:
ROM:9177                                         ; 4
ROM:9177                                         ; 2
ROM:9177                                         ;
ROM:9177                                         ; The 4 means three 0-bits followed by one 1-bit (8 if bits are reversed)
ROM:9177                                         ; The 2 means one 0-bit followed by one 1-bit (so a pair of 2's is 0x0A if bits are reversed)
ROM:9178                 db    2                 ; 0x0A (01 01 LSB first)
ROM:9179                 db    2
ROM:917A                 db    1                 ; The required 0x57 the LD-700 expects is encoded as
ROM:917A                                         ; 1
ROM:917A                                         ; 2
ROM:917A                                         ; N
ROM:917A                                         ;
ROM:917A                                         ; which in binary ends up being 11101010 (0x57 with bits reversed)
ROM:917A                                         ;
ROM:917A                                         ; The final value is a 0-bit so it has to be merged with the upcoming byte (3).
ROM:917B                 db    1
ROM:917C                 db    1
ROM:917D                 db    2
ROM:917E                 db    2
ROM:917F                 db    3                 ; final 0-bit of the 0x57, followed by 01.
ROM:917F                                         ;
ROM:917F                                         ; The final bytes end up being 0x4A 0xB5 (0x4A ^ 0xFF)
ROM:9180                 db    2                 ; 01
ROM:9181                 db    3                 ; 001
ROM:9182                 db    2                 ; 01
ROM:9183                 db    2                 ; 01
ROM:9184                 db    2                 ; 01
ROM:9185                 db    1                 ; 1
ROM:9186                 db    2                 ; 01
ROM:9187                 db    1                 ; 1 (trailing)
ROM:9188                 db    0
I applied this same logic to the unknown alternate laserdisc player set of commands and ended up with a full **PR-8210** command set!

So apparently the Halcyon was designed (at least at first) to work with the PR-8210 or some IR compatible player. Since the Halcyon detects when the tray is ejected or not, I doubt they actually used the PR-8210 in production. But the code is left in the ROM for posterity. Really cool!
 
I was really shocked that they encoded the commands in the ROM this way instead of having a nice function encode dynamically. But in retrospect, it kind of makes sense. Since some of the bits of one byte need to combined with bits from the next byte, whipping up this algorithm in Z80 assembly language may have been pretty tricky. So the developer(s), likely being under a time crunch and realizing they had some extra space in the ROM, probably just said "Let's just store the commands already encoded in the ROM to simplify our task!"
 
The actual story will likely remain a mystery forever... *ominous music*

Friday, January 8, 2021

Dragon's Lair's software watchdog

I've been rewriting Daphne's Z80 emulator (from scratch) and testing it on Dragon's Lair.  I've got it far enough along so that it loops at the disc routine at 0x231 waiting for an LD-V1000 strobe.  While I had it looping, I was checking out some performance metrics to see how fast my new Z80 emu was running.  To my shock, after about 1 minute, program execution moved away from that endless loop.  After a few hours of tracking down why, I discovered this software watchdog that I never knew existed.


(my disassembly below)

ROM:19E3 DecrementWatchdog:                      ; CODE XREF: IRQ+1BC↑j
ROM:19E3                 ld      hl, A0DE_WatchDogCounter
ROM:19E6                 call    DecrementMem16  ; Decrements a 16-bit memory location
ROM:19E6                                         ; Flags are set according to SBC rules.
ROM:19E6                                         ; HL: pointer to 16-bit memory value
ROM:19E6                                         ; DE and BC are clobbered
ROM:19E9                 jr      nc, CheckSoundThenExitIrq
ROM:19EB                 jp      DoSoftReset     ; watchdog has not been fed. we're stuck in an endless loop.


ROM:1FCF DoSoftReset:                            ; CODE XREF: IRQ+1CB↑j
ROM:1FCF                 ld      sp, 0A3FFh      ; blow away all stack info; start over.
ROM:1FD2                 ld      hl, 0A030h
ROM:1FD5                 ld      de, 0A031h
ROM:1FD8                 ld      bc, 3CFh
ROM:1FDB                 ld      (hl), 0
ROM:1FDD                 ldir                    ; this appears to clear mosts of the game data except the boot-up stuff
ROM:1FDF                 call    ResetWatchdogCounter ; resets watchdog counter back to max value (about 70 seconds)
ROM:1FDF                                         ; (this must be called regularly to avoid a soft system reset)
ROM:1FE2                 ei
ROM:1FE3                 jp      loc_1244        ; this is an alternative to "RETI"; essentially giving up on recovering


ROM:1C2D ; =============== S U B R O U T I N E =======================================
ROM:1C2D
ROM:1C2D ; resets watchdog counter back to max value (about 70 seconds)
ROM:1C2D ; (this must be called regularly to avoid a soft system reset)
ROM:1C2D
ROM:1C2D ResetWatchdogCounter:                   ; CODE XREF: START+10↑p
ROM:1C2D                                         ; sub_15B4+F5↑p ...
ROM:1C2D                 ld      hl, 8AAh
ROM:1C30                 ld      (A0DE_WatchDogCounter), hl
ROM:1C33                 ret
ROM:1C33 ; End of function ResetWatchdogCounter
ROM:1C33
ROM:1C34
ROM:1C34 ; =============== S U B R O U T I N E =======================================

Thursday, January 2, 2020

My new Z80 emulator

So five years ago, I started speculating about how emulators could be improved and came up with several ideas.  One of them was to emulate the clock pin on CPUs (and other devices such as flip-flops or the PIA6821) for maximum accuracy.  I speculated that this would take a major performance hit but perhaps with multi-threading technology, this performance hit could be offset.

Well, I've been working on this secretly for several months now.  I've emulated almost every TTL chip on the Dragon's Lair logic board as a standalone device and tied them all together.  Performance at the moment is barely adequate on modern beefy hardware (75% CPU usage on a single thread on an AMD Ryzen) and not adequate on a Raspberry Pi 4.

I experimenting with using multi-threading solutions to speed this up, but the critical timing and the need to keep the whole system running in lock-step made me conclude that this must be run on a single thread.  I'll keep looking at ways to use other threads to offload things like video and sound processing which I think will work fine.

So the good news is that I believe I'll be able to design the "perfect" Dragon's Lair emulator and it will be able to run at full speed on modern CPUs (such as the aforementioned Ryzen) and possibly even older CPUs like the Intel i5.  When I say perfect, I mean that every single pin on every single IC in the system (including the Z80) will be emulated and have the exact timing of original hardware.  Where a device is digital, there will be no shortcuts.  (analog devices such as the sound chip will not be held to this same standard of perfection).  I'm pretty excited about this because I sometimes study/repair original game board sets and not having the ability to study how the hardware is supposed to work via emulation has been quite inconvenient.

The bad news is that Dragon's Lair is the simplest of laserdisc games, so a game like Star Rider (which has three 6809E CPUs and a ton of TTL chips) probably won't able to run at full speed even on the newest of hardware using this approach.  I'll be looking at thoughtful optimizations/compromises to make for these scenarios since obviously with enough compromises, any of these old games could be made to run at full speed.

Here's a brief description of how the Z80's pins work from an arbitrary instruction:


Here's every single pin of a Z80 captured via my logic analyzer.  When I embarked on the journey to emulate this beast, I thought "this is insane.  it will take so long to figure this stuff out."  but.. this is the kind of emulator I want Daphne to be, so I did it anyway.  now it's starting to make sense.

I had to do two separate captures because my logic analyzer can capture 32 pins at a time (which is a ton!) and the z80 has 40 pins.  that alone almost made it give up.

I've put colored lines to show how this instruction (LD (HL), 00h) works.

First section ("M1") is loading the instruction's opcode from the ROM program.  It sets the address to 1153h, lowers RD and MREQ lines, then the EPROM puts 36h on the data bus.  Z80 then raises RD/MREQ, then lowers MREQ/REFRESH, putting the number 0005h on the address bus which is used for dynamic ram to refresh itself (I think dragon's lair ignores it because it uses static ram).  That takes 4 clock cycles and is known in Z80 speak as "M1".  Next section ("M2") it needs to read the rest of the instruction, so it sets address to 1154h, lowers RD/MREQ again and the EPROM puts 00h on the data bus.  M2 is complete.  Now it has the full instruction.  It goes to the next section ("M3").  HL happens to have a value of A000h, so it sets the address bus to A000h, lowers MREQ but instead of lowering RD, it puts 00h on the data bus and lowers WR which tells the rest of the system that "Hey, I want to write a 00h to address A000h".  The rest of the system's hardware maps that address to the RAM and the RAM wakes up and grabs the data from the data bus and stores it.

The amazing thing is... how did they design the Z80 in 1976 or whenever?

Saturday, July 21, 2018

Euro DL PCB arrived today!


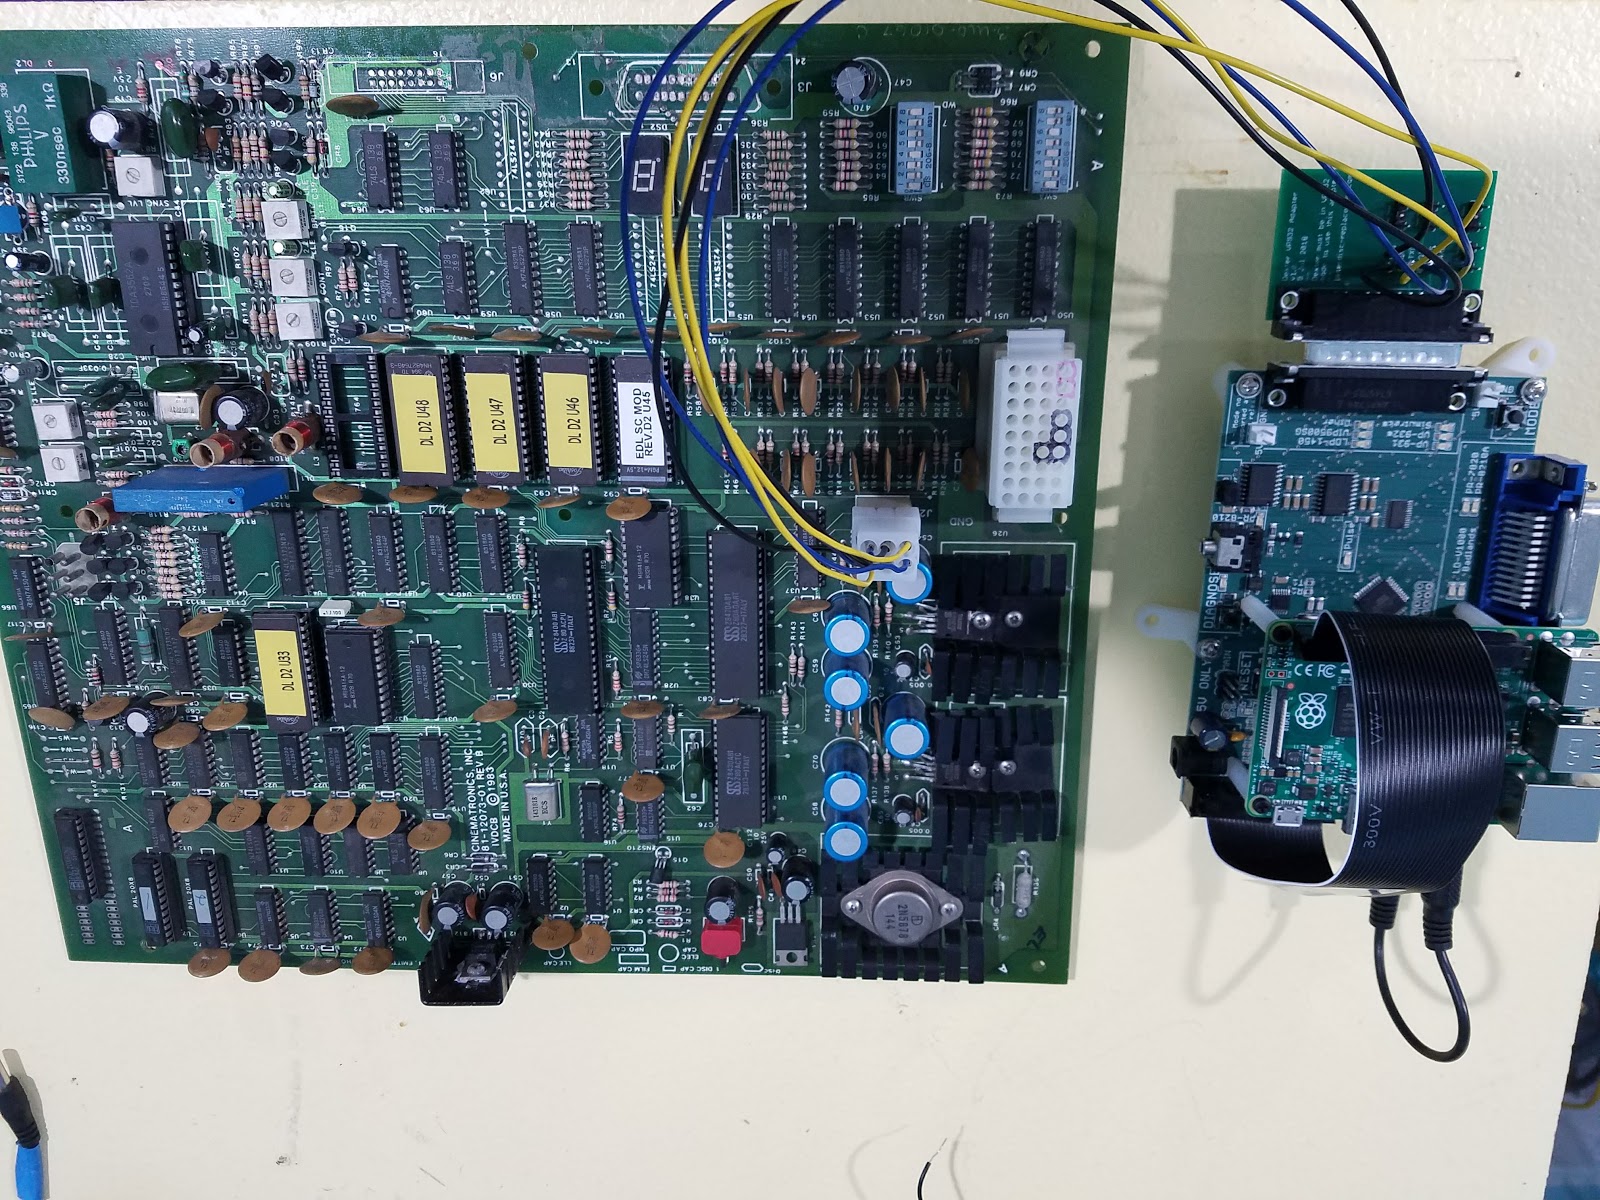
Thanks to Matteo Marioni, I now have a Euro Dragon's Lair PCB on loan for Dexter development.  The molex connector that I soldered up for the Dexter add-on board seems to fit!  Phew!

I just happened to have the 36-pin connector type (which isn't available to buy anymore!) so my next step is to create a test bench wiring harness and then hook up a logic analyzer to sniff the serial I/O.  This is exciting progress!

Monday, May 28, 2018

Punch Out Arcade Free Play Enhancement

("Too Long Didn't Read", skip to the end!)

So I recently acquired a Punch-Out arcade game (one of the ones I remember playing as a kid, could never defeat Bald Bull!).  It came with a helpful freeplay mod installed (which I am assuming came from here ) which is a really nice improvement from the stock Nintendo freeplay mode.  The stock freeplay mode basically coins up the game on power-up and sits there waiting for a button press, which puts the game's CRT monitors at risk of burn-in.  The freeplay mod I linked is a big improvement but it still has some room for improvement.  Specifically, when 'coining up' by pressing 'uppercut', the player is taken to a screen where they must manually press the left punch button in order to start the game.  As far as I can tell, this screen never goes away.  Why is this bad?  Well, I have kids and I have a day job.  If the kids power on my Punch-Out while I'm gone and leave it in this aforementioned state, my CRT is at risk of burn-in.  Believe me, I do _NOT_ want to find a replacement for these CRTs!  I've got much better things to do with my time!

So I decided to see if I could improve the freeplay mod I mentioned before to never leave the screen stuck waiting for a button press.

I used MAME's source code to get memory map and I/O map of the game, MAME's excellent built-in debugger to set breakpoints and watchpoints, and my trusty copy of IDA (Interactive Disassembler) to make understanding the code easier.  I also compared the aforementioned freeplay mod with the unmodified ROM to take a shortcut to understanding where the game looks for coin insertions.

Here is what the previous mod changes:

ROM:039A                 in      a, (3)          ; query dip switches
ROM:039C                 and     0Fh             ; isolate free play
ROM:039E                 cp      0Fh             ; are we in free play mode?
ROM:03A0                 jr      nz, NotFreePlay ; branch if not in free play mode

The mod changes 39C to AND with 0 instead of 0Fh and to compare with 1 instead of comparing with 0Fh.  This has the result of always taking the branch of 3A0 which pops us into the normal attract mode on power-up instead of Nintendo's crappy original freeplay behavior.

Next mod is at 61d:

ROM:061D                 in      a, (1)          ; query joystick and coins
ROM:061F                 ld      e, a
ROM:0620                 ld      b, 80h          ; isolate coin1
ROM:0622                 call    ActIfCoinInserted
ROM:0625                 ld      l, 0D6h
ROM:0627                 ld      a, e
ROM:0628                 ld      b, 40h ; '@'    ; isolate coin2
ROM:062A                 call    ActIfCoinInserted

the mod moves this code to an unused section of the ROM at $2AC0 and adds a check to see if the upper-cut button (aka button 3) is pressed.  If it is, it does some other simple checks and eventually ensures that 1 credit is now available which normally puts the game into the mode where it prompts the player to press left punch to start a new game.

I had no idea where this loop took place that repeatedly polled the state of the left punch button.  Fortunately, MAME's built-in debugger is quite powerful and allows setting of I/O watch points.  I referred to MAME's source code for Punch-Out and discovered that the buttons are read by reading I/O port 0.  So I simply told MAME to break any time something somewhere in the code read this port.

In addition to MAME breaking at the modified code to check to see if the uppercut button was being pressed, it rewarded me by breaking here:

ROM:12BA CheckLeftPunchNewGame:                  ; CODE XREF: ROM:12DA↓j
ROM:12BA                 in      a, (0)
ROM:12BC                 and     1               ; check to see if button 1 is pressed
ROM:12BE                 jr      nz, loc_12B5    ; branch if it's pressed
ROM:12C0
ROM:12C0 LeftNotPressed:                         ; CODE XREF: ROM:12F0↓j
ROM:12C0                 call    sub_2937
ROM:12C3                 jr      loc_1289

This was clearly the code I was looking for to see if left punch was getting pressed.
The only danger was that I didn't know if this code only got called after a coin was inserted and while waiting to start a new game or if it was a generic 'read the button' routine and was used during the game itself.  If the former, I could just change the behavior of the branch to always assume that the button was being pressed.  If the latter, I would have to dig deeper to avoid altering the behavior of the gameplay itself.

I disabled the breakpoint, then started a game.  As soon as Glass Joe appeared, I re-enabled the breakpoint at $12BA and to my delight, the breakpoint was not getting hit.  This meant that the code was only used when waiting for a new game.  Woohoo!

Now I just had to find the code that checked to see if the player wanted to do a 'rematch' after losing the game.  I knew that I had to change the behavior from the way the original game worked to prevent potential burn-in, so I had to make a decision about whether to always start a new game if a player 'coins up' during the fast timer, or always do a rematch if the player 'coins up' during the fast timer.  I decided that if the player 'coins up' after losing the game, this means that they always want to do a rematch (never a new game).  If the player wants to do a new game, they'll just have to let the fast timer expire.

I had noticed some other code near $12BA which also read from I/O port 0 but checked for button 2 (aka right punch).  The code was here:

ROM:12E6 CheckBothButtonsGameOverCreditIsNonZero:
ROM:12E6                                         ; CODE XREF: ROM:12E2↑j
ROM:12E6                 in      a, (0)
ROM:12E8                 and     4
ROM:12EA                 jr      nz, loc_12B5    ; branch if right is pressed
ROM:12EC                 in      a, (0)
ROM:12EE                 and     1
ROM:12F0                 jr      z, LeftNotPressed

So I set a breakpoint at $12E6, then destroyed Glass Joe and allowed Piston Hurricane to defeat me.

After my game was over, I saw the 'fast timer' urging me to insert a coin.  I hit 'uppercut' to credit up, and was gratified to have the debugger break at $12E6.  Woohoo!

From this point, future modifications were easy:

I simply had to change the "jr nz, 12b5" at $12BE to "jr 12b5" (always jump instead of jump if non-zero) and do a similar change at $12EA from "jr nz, 12b5" to "jr 12b5".

This mod was fairly easy for me to perform but I stood on the shoulders of giants who did all of the hard work.  The tools that made it easy:
- MAME source code that had the I/O ports and memory map
- MAME debugger (super nice for a free project)
- The pre-existing freeplay mod that allowed me to take some major shortcuts

TOO LONG, DIDN'T READ:

- Apply the Punch-Out freeplay mod from here .
- Using a hex editor, make these additional changes inside of the EPROM at 8L (MAME calls it chp1-c.8l),
change $12BE from 20 F5 to 18 F5
and
change $12EA from 20 C9 to 18 C9

Hopefully this makes it so you never have to worry about CRT burn-in even if your kids are playing your game while you are gone.

Monday, July 17, 2017

Esh bug explained

In my previous blog post, I mentioned that there is a bug on Esh's Aurunmilla stage 7.  The bug is that if you lose all of your lives, the game over screen does not play properly.

The reason for this is that the game over screen starts at picture number 23253, and Esh's mistakenly tells the laserdisc player to autostop once it reaches picture number 23247 which is before the game over section starts.

The incorrect autostop picture number, 23247, is stored as hex 0x5ACF at memory location $215E in the Esh ROM.

Friday, July 14, 2017

Where Esh's Aurunmilla stores its 'current stage'

There's been some discussion about an Esh's Aurunmilla bug that shows up on stage 7.

Out of curiosity, I dug into the ROM program a little bit to see how hard it would be to modify the program to start on stage 7 to make testing easier.  After all, no one wants to play all the way to stage 7 just to test a fix!

I found that the stage value is stored at 0xE424 + whatever value is at 0xE3C1.  Here is code at 0x3d06 that prints out the current stage (before each stage):

seg000:3D06 print_current_stage:                    ; CODE XREF: seg000:3B4C p
seg000:3D06                 push    af
seg000:3D07                 push    bc
seg000:3D08                 push    de
seg000:3D09                 push    hl
seg000:3D0A                 call    sub_0_BC7
seg000:3D0D                 ld      a, 1
seg000:3D0F                 call    sub_0_3AAC
seg000:3D12                 ld      b, 1
seg000:3D14                 ld      hl, stage_number_txt
seg000:3D17                 call    pre_print_text
seg000:3D1A                 ld      hl, 0E424h      ; prepare to load current stage data
seg000:3D1D                 ld      a, (0E3C1h)     ; load optional offset
seg000:3D20                 ld      c, a
seg000:3D21                 ld      b, 0
seg000:3D23                 add     hl, bc          ; HL now contains address that contains stage value
seg000:3D24                 ld      l, (hl)         ; load stage value into L
seg000:3D25                 ld      h, 0
seg000:3D27                 ld      b, 14h
seg000:3D29                 ld      c, 0Eh
seg000:3D2B                 ld      e, 3            ; 3 digits for the stage number
seg000:3D2D
seg000:3D2D while_stage_not_printed:                ; CODE XREF: print_current_stage+3D j
seg000:3D2D                 push    bc
seg000:3D2E                 ld      b, 10           ; base 10 conversion
seg000:3D30                 call    hex2dec         ; Hex conversion
seg000:3D30                                         ; Src number is in HL.
seg000:3D30                                         ; Base will in B (ie 10 for base 10 conversion).
seg000:3D30                                         ; Returns the lowermost digit in A and HL will be have been divided by the base (ie if HL originally contained 3387 decimal, it will return as 338 decimal with 7 in A).
seg000:3D30                                         ;
seg000:3D33                 pop     bc
seg000:3D34                 push    de
seg000:3D35                 add     a, 30h ; '0'    ; convert to ASCII?
seg000:3D37                 ld      d, a
seg000:3D38                 ld      e, 9
seg000:3D3A                 ld      a, 1
seg000:3D3C                 call    print_letter    ; prints one letter to the screen
seg000:3D3F                 pop     de
seg000:3D40                 dec     b
seg000:3D41                 dec     b
seg000:3D42                 dec     e               ; decrement digits left count
seg000:3D43                 jr      nz, while_stage_not_printed
seg000:3D45                 pop     hl
seg000:3D46                 pop     de
seg000:3D47                 pop     bc
seg000:3D48                 pop     af
seg000:3D49                 ret

The stage value is incremented around 0xD7D:

seg000:0D7D loc_0_D7D:                              ; CODE XREF: seg000:0D6A j
seg000:0D7D                                         ; seg000:0D79 j
seg000:0D7D                 ld      hl, 0E424h      ; base address where current stage lives
seg000:0D80                 ld      a, (0E3C1h)
seg000:0D83                 and     a
seg000:0D84                 jr      z, loc_0_D87    ; this can increment the current stage
seg000:0D86                 inc     hl
seg000:0D87
seg000:0D87 loc_0_D87:                              ; CODE XREF: seg000:0D84 j
seg000:0D87                 inc     (hl)            ; this can increment the current stage

The stage value is initially set at:

seg000:0E69                 ld      hl, 0
seg000:0E6C                 ld      (0E424h), hl    ; set current stage to be 0

So to force the game to start on stage 7 instead of 0, one must do this:

Change the "ld hl,0" at 0xE69 to "ld hl,7".  Or change 0x21 0x00 0x00 to 0x21 0x07 0x00.

Wednesday, March 9, 2016

Emulation vs FPGA

I was thinking about this on my drive to work this morning and decided to write my thoughts down while they are still fresh in my head.

I've been hearing people talk about "one to one" (ie 1:1) or "not emulation" when talking about FPGAs.  What do they mean when they says this?

I've talked about this in previous posts, but it's been a while and now may be a good time for a refresher.

The way that CPU's in classic 80's arcade games work is that they all require a clock which alternates between a high and low state at a frequency usually in the low megahertz range (ie 1 MHz).  They also usually have at least 16 address lines and at least 8 data lines.  A few CPUs had more than this, but I will focus on the CPUs that have 16 address lines, 8 data lines, and a single clock input.

This is your typical 8-bit CPU that can address 64k of memory.  How did I conclude that it can access 64k of memory?  Because it has 16 address lines, and 2 to the 16th power is 65536 which is 64k (65536 / 1024 is 64, and 1k is 1024 bytes).  How did I conclude that it's an 8-bit CPU?  Because it has 8 data lines which is usually what people refer to when they talk about an "8-bit", "16-bit", "32-bit", or "64-bit" CPU.

The CPU's 16 address lines are always outputs, meaning that the CPU is the only device in the computer that is allowed to change its address.  The CPU's 8 data lines can be either inputs or outputs.  The CPU has other lines on it which indicate whether it is trying to read from its data lines or write to its data lines.

The CPU has a very small number of internal memory buffers called registers, but almost all of the memory that the CPU needs comes from either external ROM or external RAM.  When the CPU wants to execute an instruction (where a complete program consists of many instructions), it has to fetch the instruction from an external dependency (usually ROM or RAM).  It does this by setting its address lines to the address that it wants to fetch the memory from, and then setting its read/write lines to let the rest of the computer know that it wants the byte stored at the address on its address lines.  On power-up, the CPU will set its initial address to a fixed, known location and either start executing instructions from that location or read an address from that location, jump to that address, and start executing instructions.

Each CPU instruction takes a specific number of clock cycles to complete.

So what does all of this have to do with emulation vs FPGA ?

If I were trying to implement a CPU inside of an FPGA, I could (if I do it correctly) have the FPGA's input/output lines behave exactly like the original CPU.  And if the FPGA's I/O behaves exactly like the original CPU's I/O, then the FPGA could be considered to be 100% compatible with the original CPU and one could use it as a drop-in replacement for the CPU without sacrificing any sort of accuracy.  This is what people mean by "one to one."  I should note that from what I have seen of efforts to implements CPU's inside of FPGA's, I am not convinced that the people who put forth the effort were terribly concerned about accuracy, and may have been more concerned about making the FPGA version CPU perform faster than the original.  So just because an FPGA could in theory be a 100% accurate replacement for the CPU does not mean that this is what is happening.

Now, what might people mean when they say "not emulation" ?

CPU emulators, such as what one may find in MAME, take a few shortcuts in order to achieve decent performance.  They do not emulate the clock of the CPU, but instead are designed to execute a variable number of cycles in one shot as quickly as the host machine (ie a modern x64 computer) can execute.  The code that is driving this execution is then responsible to regulate the overall speed of the system so that it does not run too quickly.

For example, let's say we are emulating a 1 MHz Z80 cpu.  The cpu management code may tell a z80 emulator to execute 1000 cycles which would take 1 ms on original hardware.  The z80 emulator would then go execute these 1000 cycles as fast as possible and report back how many cycles were actually emulated (it might be more than 1000 because some instructions take more than 1 cycle).  The cpu management code would then have to stall until the 1 ms period has completed before executing the next chunk of cycles.

This creates an unauthentic experience because it means that instead of instructions being executed at a steady slower cadence, they are executed in quick bursts with delays in between.  This is usually not noticeable by a human playing the emulated game because it's just 1 ms, but several problems can arise depending on the other architecture of the original hardware.

On a game like Dragon's Lair where there is just one CPU and a steady clock that never varies, the above method of emulation is "good enough."  A human is not really going to notice any meaningful difference in accuracy.

But what of the game has multiple CPUs such as a dedicated sound CPU?  Now the emulator has to execute a smaller slice of cycles on the first CPU, then switch to the second CPU and execute another smaller slice of cycles.  If there are interactions between these two CPUs (and there usually will be), the slice of cycles that gets executed needs to be small enough so that there is no unnatural lag in the interactions which hurts performance of the overall system.  And even if each CPU takes turns executing just 1 cycle, the potential for an inaccurate interaction between the two emulated CPUs still exists since the emulator does not take into account the clock.

Now, what if the original hardware fiddles with the CPUs clock, or the clock is not constant for some reason?  The Williams games are notorious for doing this.  On a lot of the Williams games, like Joust, their custom DMA chip will actually halt the CPU while the DMA operation is running.  On Star Rider, the CPU's clock gets halted every field for unknown reasons (that's on my TODO list to figure out why).  Last time I checked, this behavior was not emulated very well in MAME (it may have improved since I last checked) and certainly Daphne is not equipped to handle this type of scenario.  However, an FPGA would be able to handle it just fine.

Now, does this mean that emulators like MAME and Daphne can't be improved to take into account a variable clock?  Not at all.  As modern computers get faster, it will become more feasible for emulators to become more accurate without hurting performance.  I believe that aside from the problems associated with running on a modern operating system (with many processes and threads all competing for the CPU's time), there is no reason why software-based emulators cannot achieve 100% accuracy as their architectures are improved.  However, I do not believe that that day is here... yet.

I hope that gives people a better idea of what I consider the difference to be between FPGA solutions and emulation solutions.

Tuesday, October 14, 2014

Dragon's Lair ticks

I haven't posted a blog entry in a while and this is something pretty interesting that I'd like to have saved somewhere so here goes.

Dragon's Lair's scene data has a concept of 'ticks' which roughly map to clock ticks generated by the hardware.  They are used to determine how long scene segments should last.

One issue with Dragon's Lair hardware is that the clock tick frequency differs slightly across different revisions of the hardware.  Dragon's Lair's ROM program does a speed test upon boot-up to determine whether the hardware clock is faster, normal, or slower.  The result of this speed test is displayed in the scoreboard as a 1 (faster), 2 (normal), or 3 (slower).

Here is the disassembled code that documents this speed test:

ROM:11BA SpeedTestLoop:                          ; CODE XREF: START+7B j
ROM:11BA                                         ; START+88 j ...
ROM:11BA                 ld      hl, SpeedTest_A001 ; when this loop starts for the first time, HL is FFFF, DE is FFFF, and BC is 0000
ROM:11BD                 bit     1, (hl)
ROM:11BF                 jr      nz, SpeedTestGotIrq ; if this is non-zero, it means IRQ has been triggered
ROM:11C1                 inc     bc
ROM:11C2                 jr      SpeedTestLoop   ; when this loop starts for the first time, HL is FFFF, DE is FFFF, and BC is 0000
ROM:11C4 ; ---------------------------------------------------------------------------
ROM:11C4
ROM:11C4 SpeedTestGotIrq:                        ; CODE XREF: START+78 j
ROM:11C4                 res     1, (hl)         ; clear IRQ flag
ROM:11C6                 inc     d
ROM:11C7                 ld      a, 48           ; don't start tracking IRQs until we've got 48 of them
ROM:11C9                 cp      d
ROM:11CA                 jr      c, loc_11D1
ROM:11CC                 ld      bc, 0
ROM:11CF                 jr      SpeedTestLoop   ; when this loop starts for the first time, HL is FFFF, DE is FFFF, and BC is 0000
ROM:11D1 ; ---------------------------------------------------------------------------
ROM:11D1
ROM:11D1 loc_11D1:                               ; CODE XREF: START+83 j
ROM:11D1                 ld      a, 50
ROM:11D3                 cp      d
ROM:11D4                 jr      nz, SpeedTestLoop ; when this loop starts for the first time, HL is FFFF, DE is FFFF, and BC is 0000
ROM:11D6                 ld      a, c
ROM:11D7                 ld      (unk_E035), a   ; least significant digit from BC
ROM:11DA                 srl     a
ROM:11DC                 srl     a
ROM:11DE                 srl     a
ROM:11E0                 srl     a
ROM:11E2                 ld      (unk_E034), a
ROM:11E5                 ld      a, b
ROM:11E6                 ld      (unk_E033), a
ROM:11E9                 srl     a
ROM:11EB                 srl     a
ROM:11ED                 srl     a
ROM:11EF                 srl     a
ROM:11F1                 ld      (unk_E032), a   ; most significant digit from BC
ROM:11F4                 ld      a, 0Ah
ROM:11F6                 cp      b
ROM:11F7                 jr      c, BcGreaterThanOrEq0A00 ; if BC >= 0x0A00 then branch
ROM:11F9                 set     3, (hl)         ; set bit 3 of A001 to indicate that speed test's result is 'faster'
ROM:11FB                 ld      a, 1            ; speed test got a '1' result
ROM:11FD                 jr      SpeedTest1Or2Result ; set bit 0 of A001 to indicate the speed test's result is a 1 or 3
ROM:11FF ; ---------------------------------------------------------------------------
ROM:11FF
ROM:11FF BcGreaterThanOrEq0A00:                  ; CODE XREF: START+B0 j
ROM:11FF                 ld      a, 15h          ; check to see if BC >= 0x1500
ROM:1201                 cp      b
ROM:1202                 jr      c, SpeedTest3Result ; branch if BC >= 0x1500
ROM:1204                 ld      a, 2            ; speed test got a '2' result
ROM:1206
ROM:1206 SpeedTest1Or2Result:                    ; CODE XREF: START+B6 j
ROM:1206                 set     0, (hl)         ; set bit 0 of A001 to indicate the speed test's result is a 1 or 3
ROM:1208
ROM:1208 ExitSpeedTest:                          ; CODE XREF: START+CC j
ROM:1208                 ld      (unk_E038), a   ; set speed test result to scoreboard
ROM:120B                 set     2, (hl)         ; set bit 2 of A001 to indicate that the speed test is finished
ROM:120D                 jr      BootPhase2      ; play 'move' beep
ROM:120F ; ---------------------------------------------------------------------------
ROM:120F
ROM:120F SpeedTest3Result:                       ; CODE XREF: START+BB j
ROM:120F                 res     0, (hl)         ; clear bit 0 to indicate that speed test result is slower
ROM:1211                 ld      a, 3            ; display a 3 on scoreboard
ROM:1213                 jr      ExitSpeedTest   ; set speed test result to scoreboard
ROM:1215 ; ---------------------------------------------------------------------------


So what does the result of the speed test mean for the ticks?

If the speed test got a 1 (faster) or a 2 (normal), then every 31st tick is dropped.  If the speed test got a 3 (slower) then every 255th tick is dropped.  Here is the code which handles this:

ROM:1922                 ld      hl, SpeedTest_A001 ; bit 0: 1=drop every 31st tick (speedtest result was 1 of 2), 0=drop every 255th tick (speedtest result was 3)
ROM:1922                                         ; bit 1: (during speed test) 1=IRQ has been triggered, 0=IRQ has not been triggered yet
ROM:1922                                         ; bit 2: 1=normal operation, 0=speedtest active
ROM:1922                                         ; bit 3: 1=speedtest got a '1' (faster), 0=speedtest got a '2' or '3' (just right or slower respectively), see 11F9
ROM:1925                 bit     0, (hl)
ROM:1927                 jr      z, DropEvery255thTick ; drop every 255th tick
ROM:1929                 ld      b, 31           ; drop every 31st tick
ROM:192B                 jr      UpdateGlobalTickCounter
ROM:192D ; ---------------------------------------------------------------------------
ROM:192D
ROM:192D DropEvery255thTick:                     ; CODE XREF: IRQ+107 j
ROM:192D                 ld      b, 255          ; drop every 255th tick
ROM:192F
ROM:192F UpdateGlobalTickCounter:                ; CODE XREF: IRQ+10B j
ROM:192F                 ld      hl, GlobalTickCounter_A000 ; keeps a count of how many ticks we've processed so that we can drop ticks from time to time
ROM:1932                 ld      a, (hl)
ROM:1933                 inc     a               ; increment tick counter
ROM:1934                 ld      (hl), a
ROM:1935                 cp      b               ; do we need to drop this tick?
ROM:1936                 jr      nz, UpdateAllTickCounters
ROM:1938                 xor     a
ROM:1939                 ld      (hl), a
ROM:193A                 jp      PostCountersUpdate ; we go here after the tick counters have been updated
ROM:193D ; ---------------------------------------------------------------------------
ROM:193D
ROM:193D UpdateAllTickCounters:                  ; CODE XREF: IRQ+116 j


Additionally, the IRQ service routine will periodically skip certain work if the speed test was a '1' in order to 'slow down' the timer in software.

Therefore, to reliably understand how many seconds a certain number of 'ticks' mean in the Dragon's Lair move data, one can apply this algorithm:

Assume that the hardware clock 'ticks' every 32.768 milliseconds and that the CPU is 4 MHz.  This will yield a speed test result of 2 (normal).

extraTicks = ticks / 30; /* (no remainder, for example, 31/30 would be 1, not 1.0333) */
adjustedTicks = ticks + extraTicks;
seconds = (adjustedTicks) * 0.032768;

Wednesday, August 13, 2014

Troubleshooting Galaxy Ranger

I've been trying to troubleshoot a non-working Dexter setup with Galaxy Ranger and ended up writing some Z80 assembly language to modify the ROM for greater visibility.  This little code snippet will print the LD-V1000 status to the screen.  I am putting it here so I can find it again later if I need it :)

$D46 and $D47 should be changed from 0xCD 0x15 to 0x60 0x5B.  The new code should be put at location $5B60 (lives on the second EPROM) in memory which is filled with 0xFF's on the stock ROMs.

; modify Galaxy Ranger to display LD-V1000 status code during "WARM-UP"

        org 0x5b60
start:
        ; preserve registers
        push hl
        push bc
        push af

        ; set target pointer
        ld hl, 0xF169   ; right above $F189 'warming up' text (each row is 0x20$
        ld a, (0xc800)  ; LD-V1000 I/O flip-flop
        ld b, a

        ; isolate top nibble
        srl     a                       ; A >>= 4
        srl     a
        srl     a
        srl     a
        cp      0xA     ; Acculumulator - 0xA is what?
        jr      c, Its0to9      ; if carry is set, it means subtraction resulte$

        ; A-F (hex)
        add     0x37    ; make it ASCII
        jr      StoreIt
Its0to9:
        add     0x30    ; make it ASCII
StoreIt:
        ld (hl), a
        inc hl

        ; now grab lower nibble
        ld a, 0xF
        and b

        cp 0xA
        jr      c, Its0to9_2
        add 0x37
        jr StoreIt2
Its0to9_2:
        add 0x30
StoreIt2:
        ld (hl), a

        ; restore registers
        pop af
        pop bc
        pop hl

        ; go to where we were supposed to originally
        jp 0x15CD